Center Skin Panel Work
I had hoped to get the center skin paneling completed by now, but cold temperatures and other activities are slowing me down. I have made some progress and will outline that here.
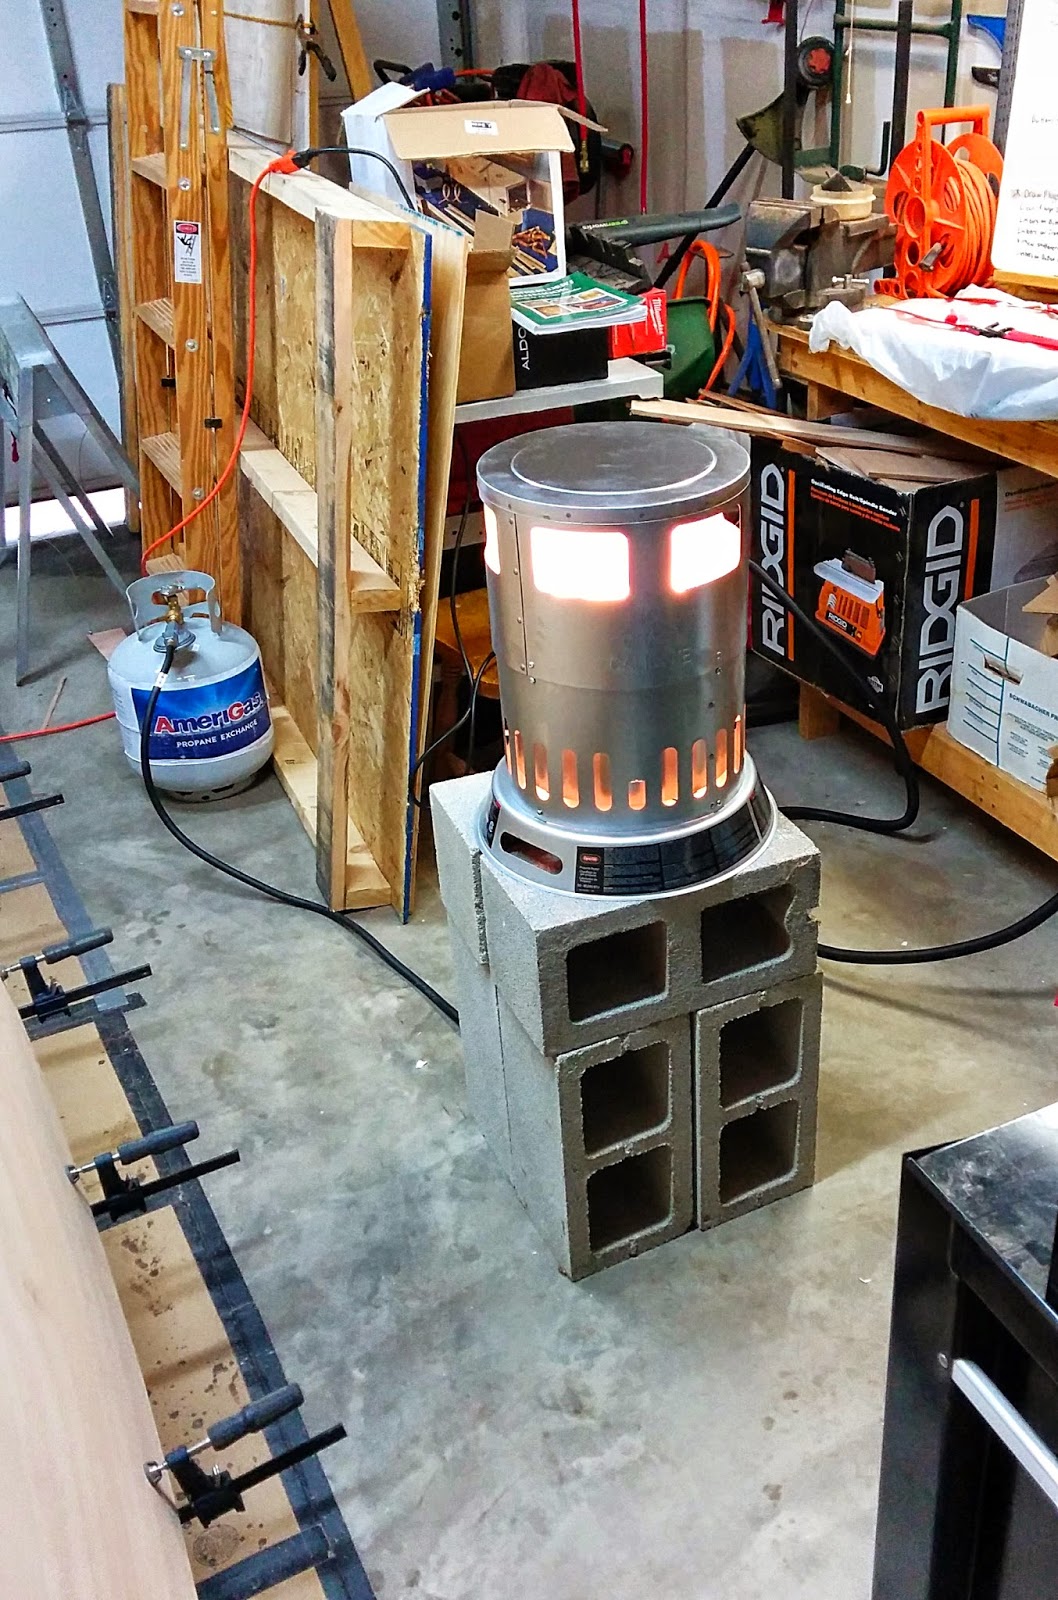
In an attempt to improve productivity I purchased a propane heater for my garage and it works well. But I found out that a 20 pound tank of propane will only last about 5 or 6 hours at the medium heat setting so I will only be using this on the colder days or when I need to do some epoxy work. Even the epoxy work will still need to wait for warmer weather because of the cure time required afterwards (cant continually run the propane burner to keep the garage warm while the epoxy cures).
As for the skinning, both sides have been worked on. The port side center skin was finished first. I found that I was going to need to get creative when clamping the center skin to the forward and aft skins in order to get the center skin to conform to the vertical curves on the other skins.
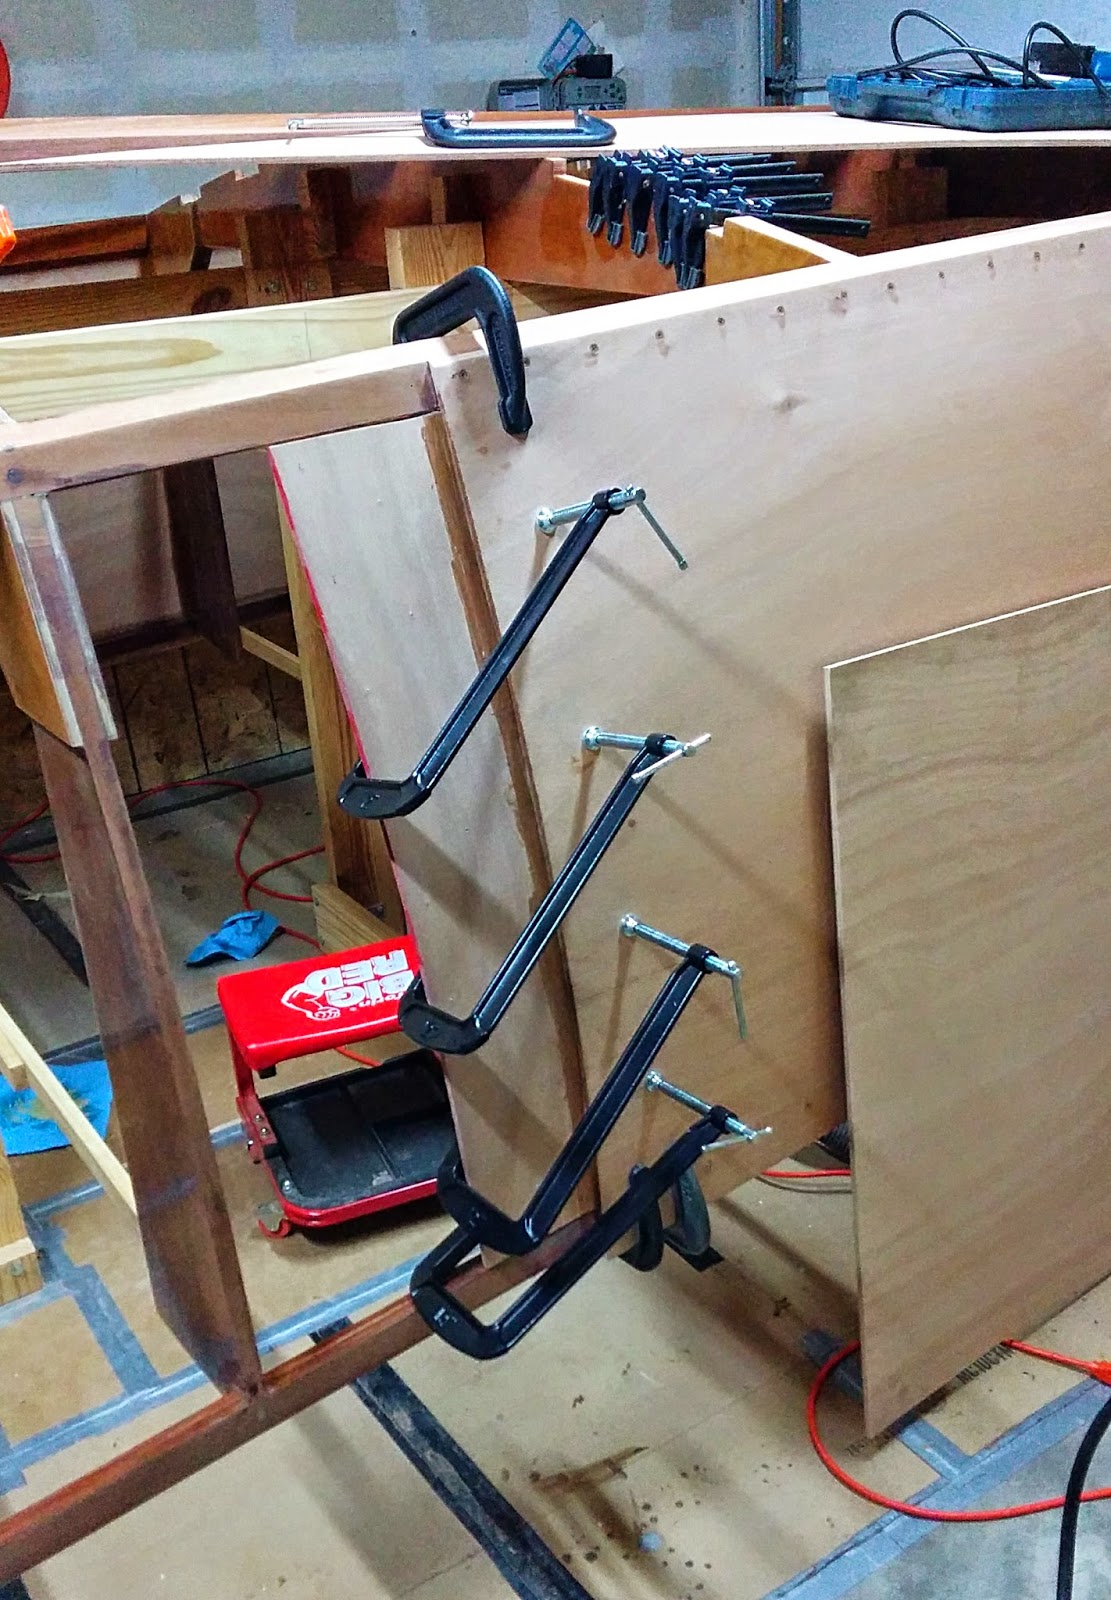
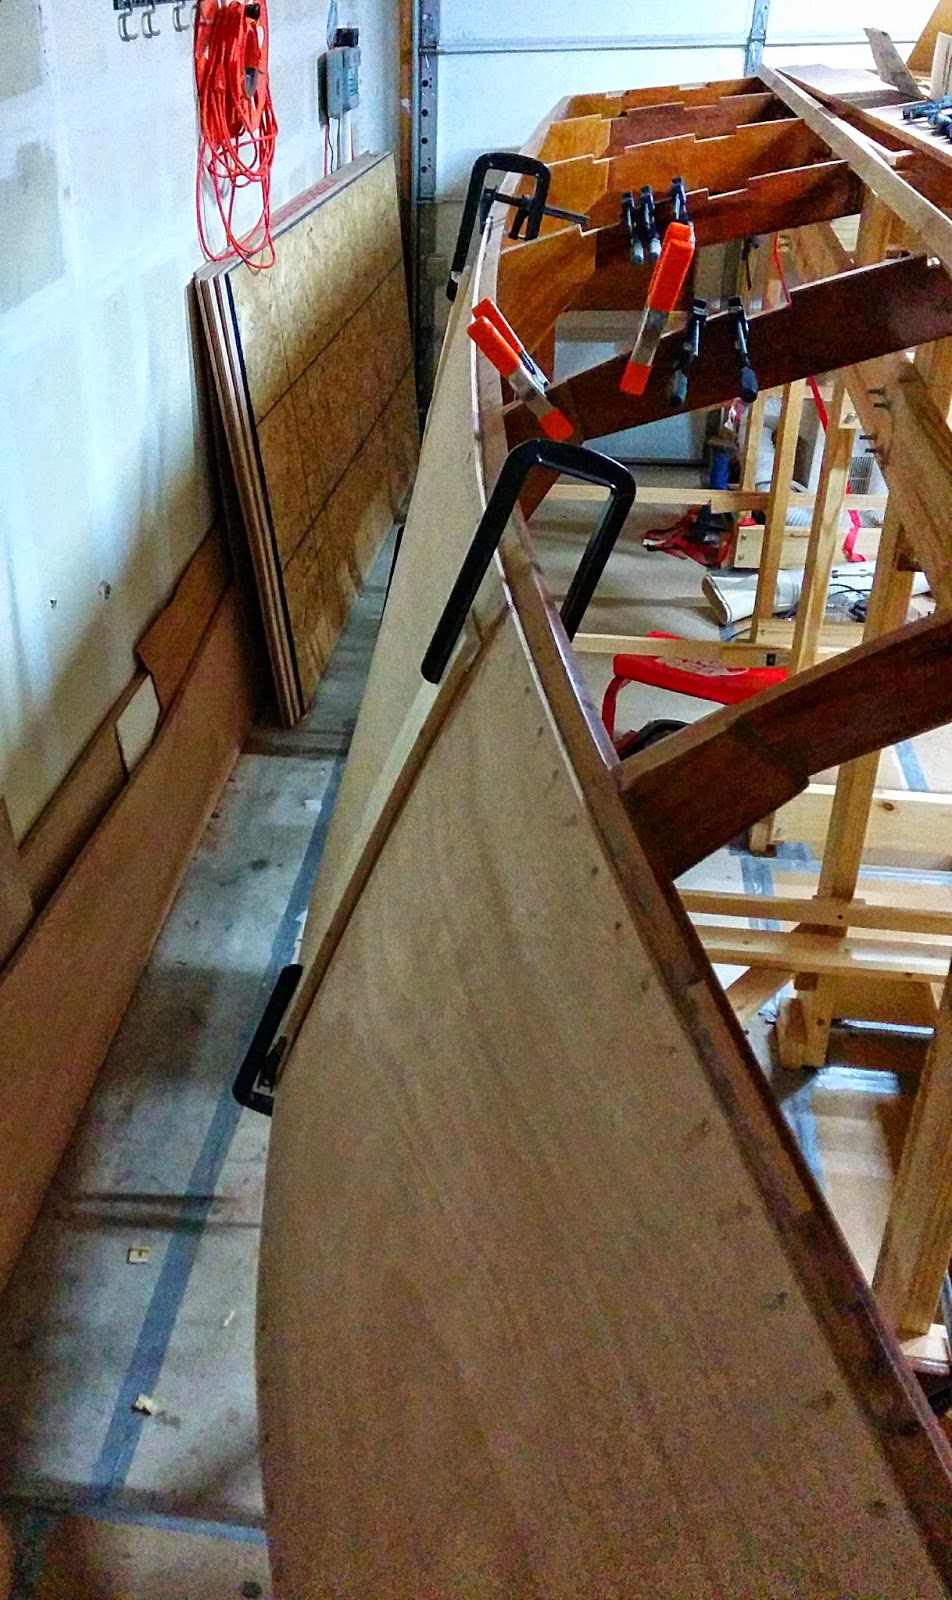
Readers will recall that when I had installed the backing plates at these butt joints, I had used a board and some clamps on the forward backing plate to get it to conform to the curve on the forward skin. This worked out okay, but I knew I was going to have to get some long throat clamps for the next set of backing plates.
I was able to get four of these from Harbor Freight for a reasonable price, but the quality of these clamps are so so. However, for my purposes, they would suffice.
Here they are used in clamping the starboard side backing plate.
The backing plates are installed with a combination of epoxy and short silicon bronze screws (screwed in from the inside). Once the epoxy cured for several days, I was able to remove the clamps and the backing plate was fine.
The starboard side center skin panel was fitted next and that is ready to go for installation as soon as weather permits.
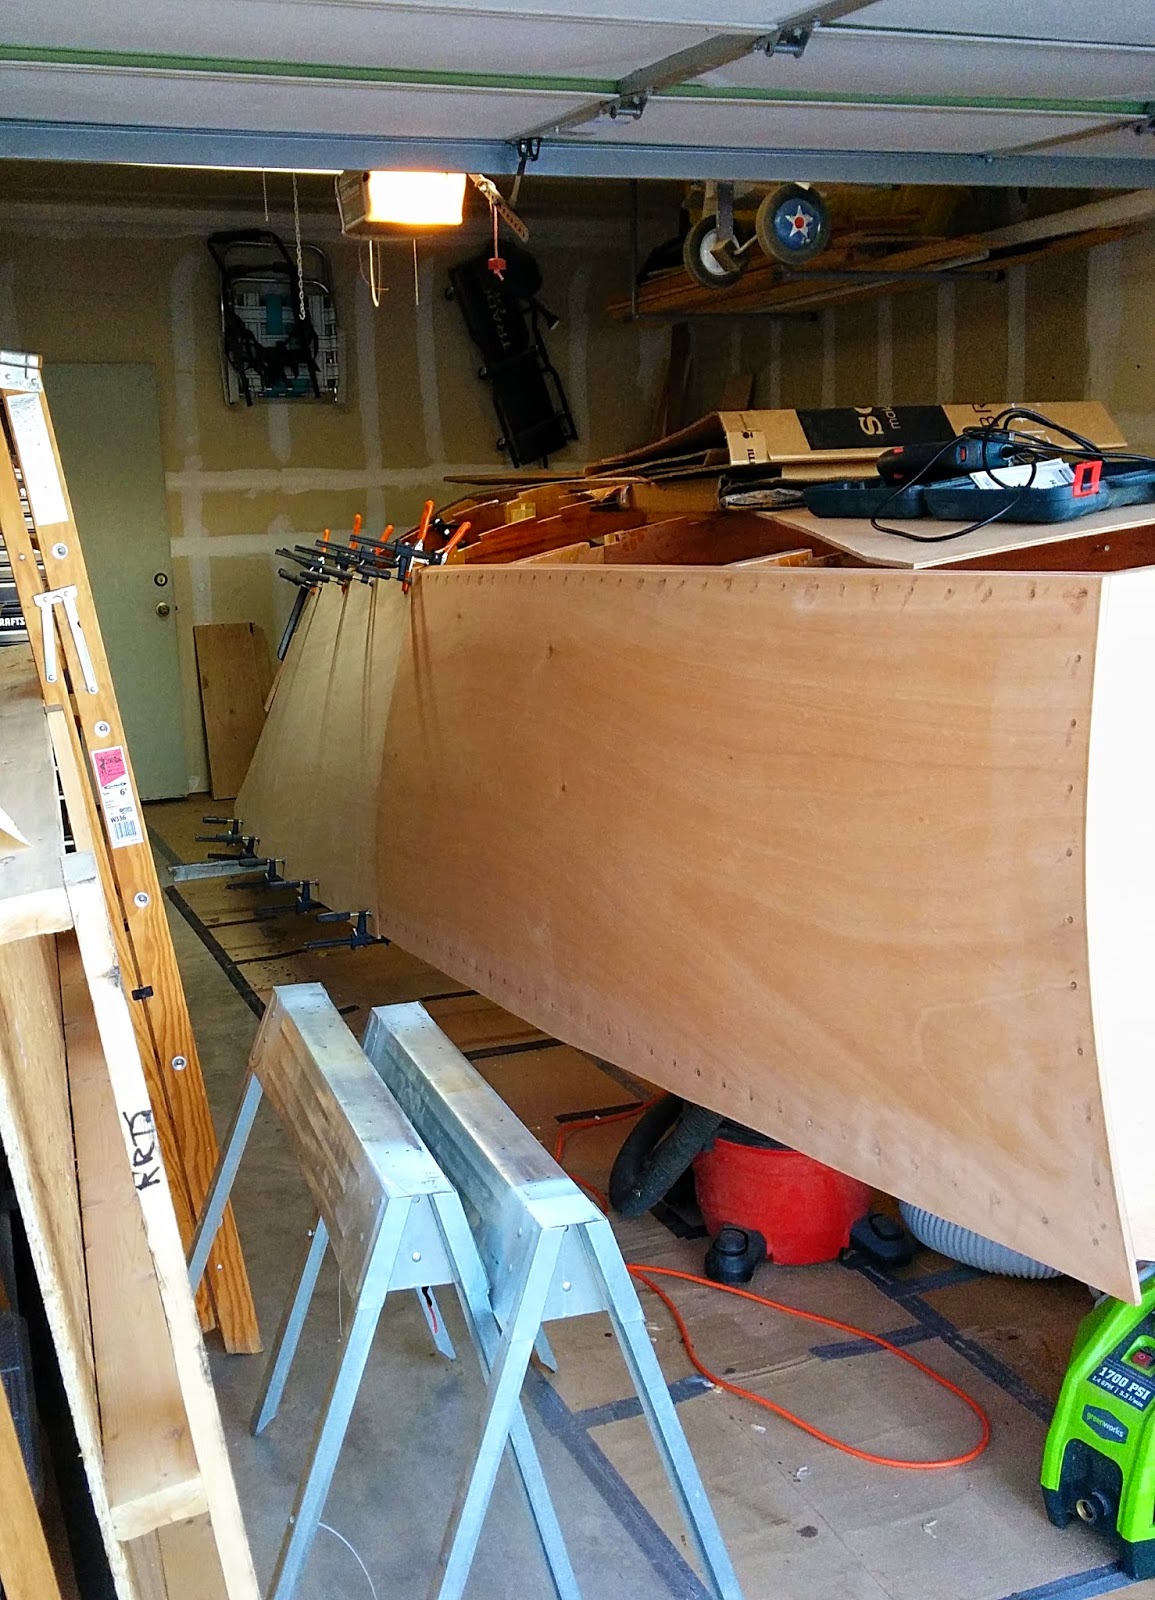
The port side center panel was installed permanently and this is were I had to come up with creative methods of clamping. The clamped board forces the center skin panel down to the backing plate and makes it conform to the vertical curve of the forward and aft skins.
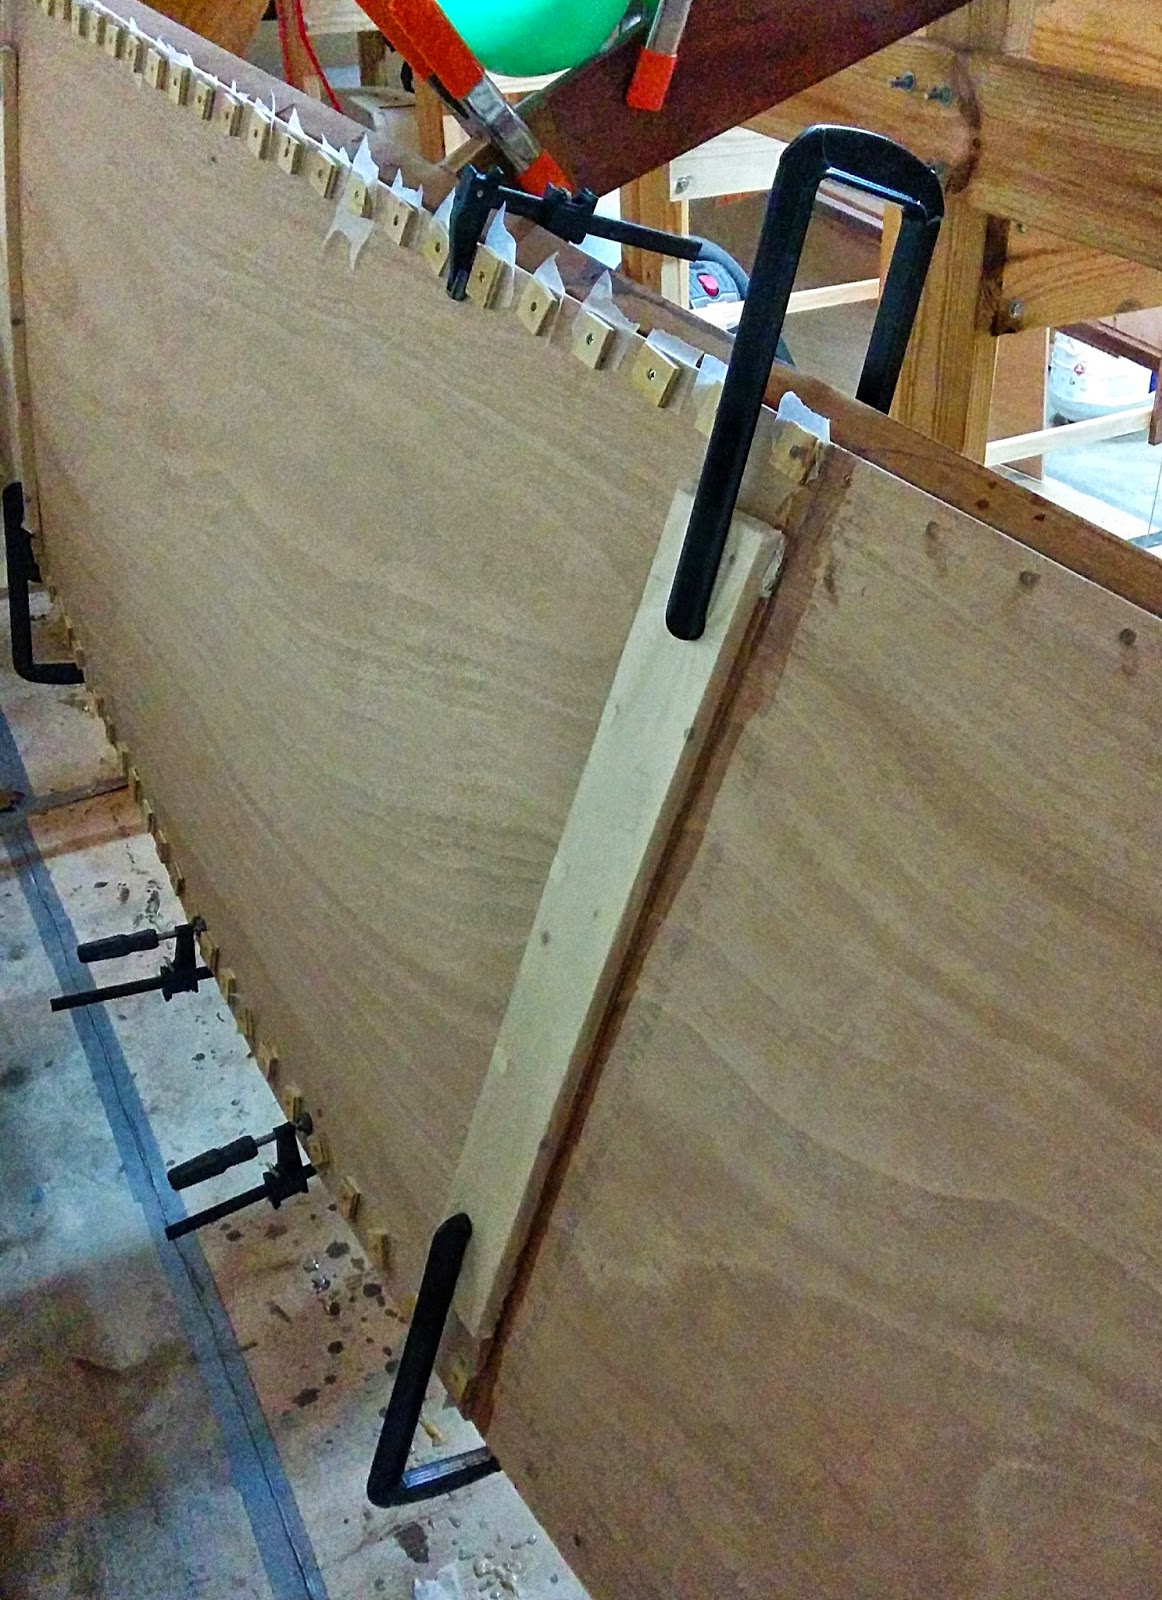
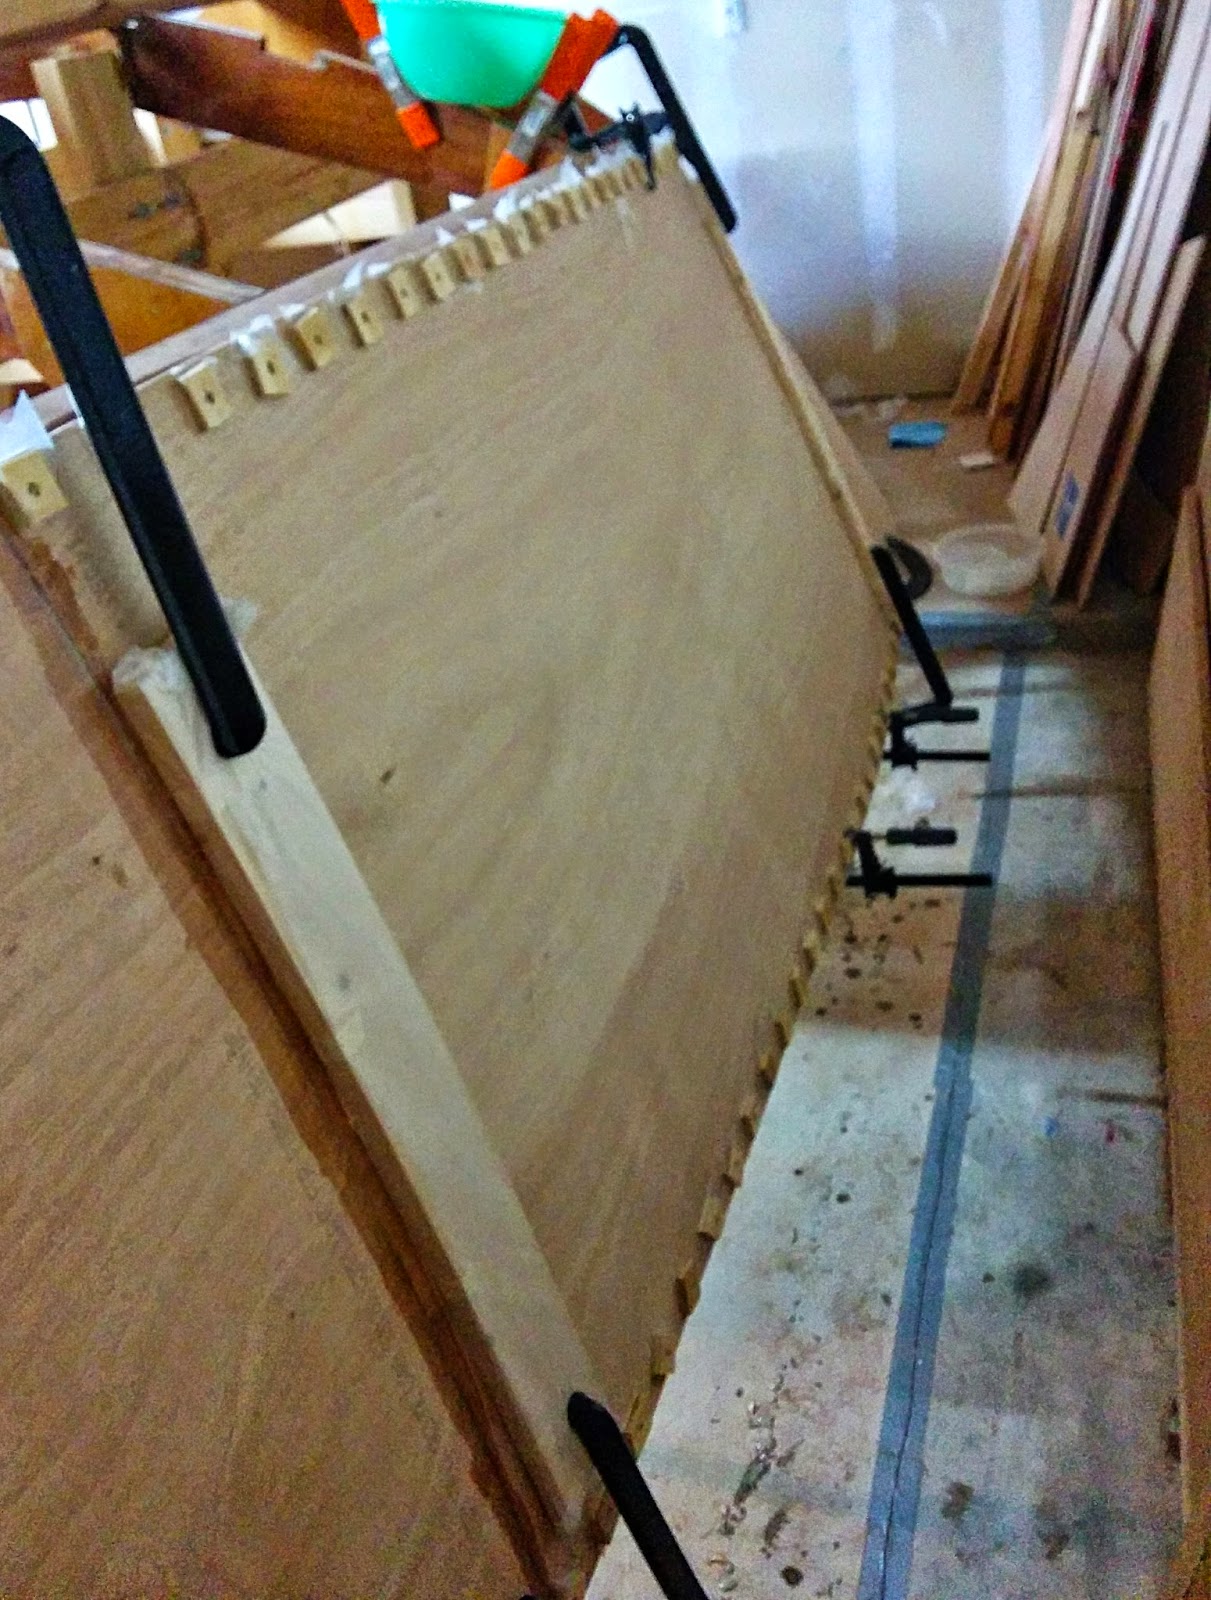
It was fairly cold that day but within acceptable limits for the epoxy. My normal process for these skins is to glue them down and use temporary steel screws with plywood washers. You can see that in the previous pictures. Then within a few hours (before the epoxy gets fully set), I replace the steel screws with silicon bronze screws. However, in this case, the epoxy took much longer to get to that point so I had to wait nearly 5 hours.
To insure that the skins stay the way I wanted them, I let this cure for several days before removing the clamps. At this point, the port side is completed except for sanding the excess glue down. Starboard side, as mentioned is ready to install. When that is installed, I will no longer have easy access to the inside of the hull. That means I have to crawl in from underneath at the aft end, or clamber over the top using a ladder.
Next up I will be purchasing additional lumber for the remaining bottom battens and doing the work to get them installed. That involves cutting them to size, cutting limber slots in each batten slot (to allow water passage aft), fitting the battens , and installing them with epoxy and wood screws. I go into that in more detail at a later date.
So thats it for now. I am hoping we get some warmer weather soon. Take care.
In an attempt to improve productivity I purchased a propane heater for my garage and it works well. But I found out that a 20 pound tank of propane will only last about 5 or 6 hours at the medium heat setting so I will only be using this on the colder days or when I need to do some epoxy work. Even the epoxy work will still need to wait for warmer weather because of the cure time required afterwards (cant continually run the propane burner to keep the garage warm while the epoxy cures).

As for the skinning, both sides have been worked on. The port side center skin was finished first. I found that I was going to need to get creative when clamping the center skin to the forward and aft skins in order to get the center skin to conform to the vertical curves on the other skins.
Readers will recall that when I had installed the backing plates at these butt joints, I had used a board and some clamps on the forward backing plate to get it to conform to the curve on the forward skin. This worked out okay, but I knew I was going to have to get some long throat clamps for the next set of backing plates.
I was able to get four of these from Harbor Freight for a reasonable price, but the quality of these clamps are so so. However, for my purposes, they would suffice.
Here they are used in clamping the starboard side backing plate.

The backing plates are installed with a combination of epoxy and short silicon bronze screws (screwed in from the inside). Once the epoxy cured for several days, I was able to remove the clamps and the backing plate was fine.
The starboard side center skin panel was fitted next and that is ready to go for installation as soon as weather permits.

The port side center panel was installed permanently and this is were I had to come up with creative methods of clamping. The clamped board forces the center skin panel down to the backing plate and makes it conform to the vertical curve of the forward and aft skins.


It was fairly cold that day but within acceptable limits for the epoxy. My normal process for these skins is to glue them down and use temporary steel screws with plywood washers. You can see that in the previous pictures. Then within a few hours (before the epoxy gets fully set), I replace the steel screws with silicon bronze screws. However, in this case, the epoxy took much longer to get to that point so I had to wait nearly 5 hours.

To insure that the skins stay the way I wanted them, I let this cure for several days before removing the clamps. At this point, the port side is completed except for sanding the excess glue down. Starboard side, as mentioned is ready to install. When that is installed, I will no longer have easy access to the inside of the hull. That means I have to crawl in from underneath at the aft end, or clamber over the top using a ladder.
Next up I will be purchasing additional lumber for the remaining bottom battens and doing the work to get them installed. That involves cutting them to size, cutting limber slots in each batten slot (to allow water passage aft), fitting the battens , and installing them with epoxy and wood screws. I go into that in more detail at a later date.
So thats it for now. I am hoping we get some warmer weather soon. Take care.
Feliratkozás:
Megjegyzések küldése (Atom)
0 megjegyzés:
Megjegyzés küldése